
Ok, well this has been sitting in the drafts folder long enough now. I was working on being further along with the Rabbit Hole part 3 update and be at point where I’m into follow-ups to that. Aside a little sidetrack for between part 2 and 3 though, there hasn’t been much progress with the drums since the last blog post. I’ve been putting in a lot of time on the pad and spending most of my time on the kit doing paradiddle related exercises, basic stuff, and going over older tracks. So notations and video on part 3 should be doable within the next month or so.
BDA #52, the main object of this post, is now halted in its ‘touch up and varnish’ phase (see description below) where it will remain as I work finishing up to the same point #53, and perhaps a few more.
The first non-digital BDA in a long time. In ever, basically, since the colored pattern series were numbered differently before the project became a mostly digital thing. Despite the fact that #51 is also of the acrylic on wood kind, seeing that last year’s only completed drawing has only just now been retro-actively re-designated as ‘Box Decorated Art’, ‘Brightly Decorated Artifact’, or BDA for short, #51.
Ingredients of BDA #52 contain 65 acrylic shapes painted on to one 3mm-thick wood panel and around the sides of its 1 inch backside frame.
- 15 red
- 14 blue
- 13 black
- 12 green
- 11 yellow
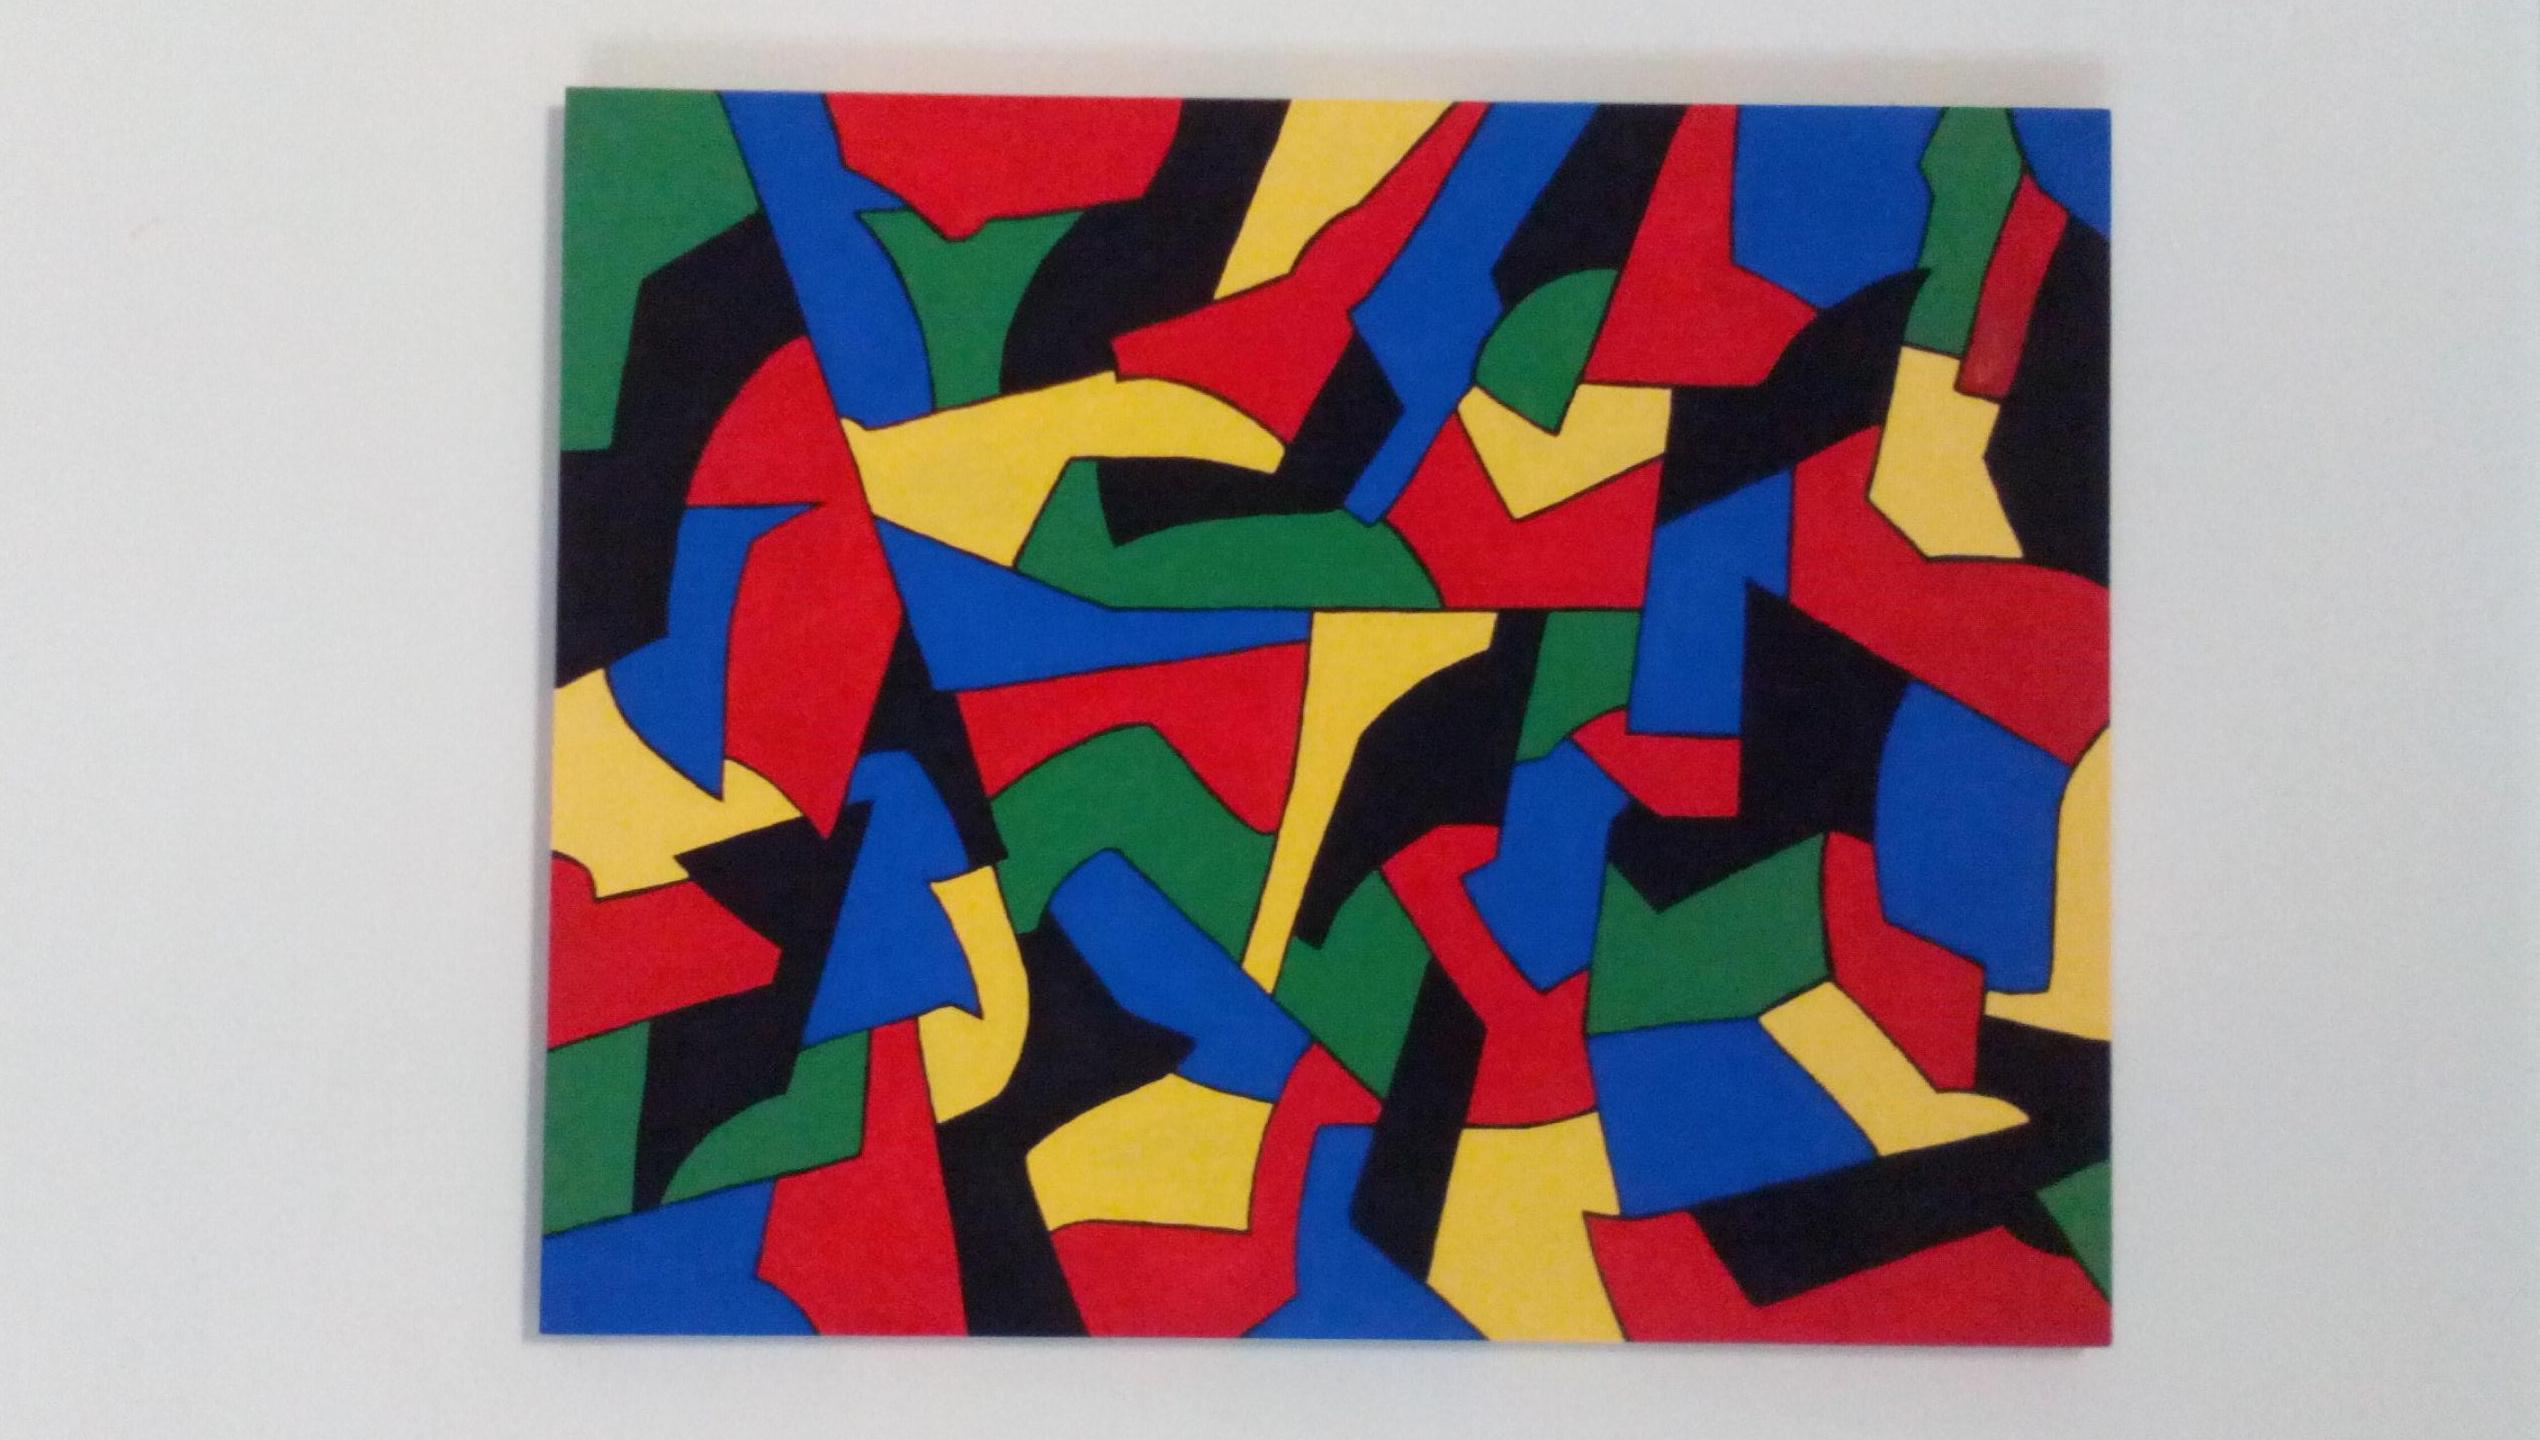
The 20″x16″ surface is first separated into 65 shapes of varying forms and sizes using black paint, then 13 of those shapes are filled with said same black paint in a way such that every shape is either directly adjacent to, or is itself, a black one. Next, color in 15 of the remaining shapes red, distributed more or less evenly across the area, making sure none of them are directly adjacent to each other. In the same, avoiding having two shapes of the same color being directly adjacent, fill in 14 of them in a blue color, then repeat again using green and coloring in 12 shapes. Paint the remaining 11 shapes yellow. After softly brushing the dry product with fine-grain sandpaper, touch up with a second coat and dry again before adding on varnish. Let dry and brush with the sandpaper again, and apply the final coat of varnish.
